Your Beginners Guide to Print
This is your beginners guide to print! Printing, as with anything new or different, can seem quite daunting to know exactly where to begin. Whether it’s terminology, specialist knowledge or lessons from hard-won experience, it can be off-putting. We have all been in that situation.
Our mission is to take the mystery out of print to show how easy it is to get started, especially when working with us.
We want to share the benefit of our experience to anyone starting their first foray into print. Particularly all the useful stuff that we wish we knew when we started. That’s what we intend to do here! There is far too much to go into on one page so where necessary we have links to take you to specialist pages.
We hope that you find what you are looking for. If you can’t, please don’t be afraid to contact us with any questions or specific concerns. Whenever you need us we are always here and happy to help you!
Getting Started and Ordering Process Overview
As part of this beginners guide to print we thought it would be a good idea to start from the very beginning.
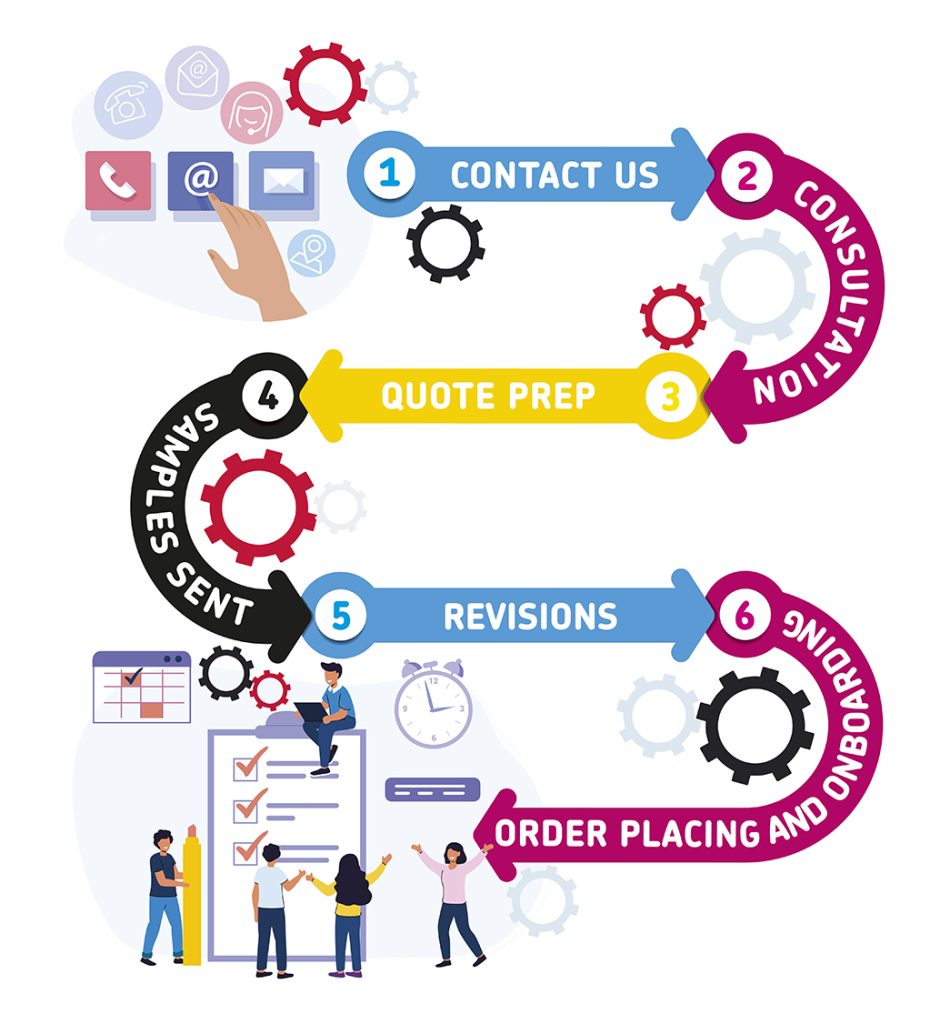
Contact us
However you decide to initially contact us, we are always excited to work with new people. The best ways of getting in touch are on our Contact Us page. Other great places would be on our socials, especially on LinkedIn.
Consultation
We are mindful that everyone is at different stages of their journey. Each of us will require differing levels of support or service. We take our lead from each customer and work with them on a one-to-one basis. With us we know that there is no “one size fits all” approach. Some customers may be satisfied with an existing spec and are only looking for pricing, which we are more than happy to assist with.
Depending on what you are looking for, we can provide options and advice. From cost implications to sustainability we have you covered! We are happy to offer advice around all areas of print even if it is not something we can produce internally.
If you would like to chat with an advisor, there is no obligation or pressure from us to buy. We appreciate that these can be long term projects stretching months and years or even just speculative. Our approach is such that we are always happy to help. If we are the right fit for your needs or perhaps not, we will always be 100% transparent with you. During these coversations we are able to guide beginners to print to hopefully find the answers that they need.
Based on the specification we can provide options and advice to give you a wider understanding of what is available and cost implications.
If we are not the right fit for your needs, we will let you know and will not waste your time.
Quoting Stage
We compile all the options from your specification or brief and possible additions from our discussions into a formal quote. On the quote you will find all the prices are listed, including any extra or additional costs and options. We appreciate that there could be a few options that you would want to consider and we provide these in a simple and easy to read format.
On each quote, there is a run-on and run-back figure allowing you to calculate the cost differences of changes in quantities.
Samples
It can be hard to visualise how papers may look and feel when discussing them. This is why we recommend that customers review papers and request to see both blank and printed samples. From these samples, you will get not only an idea of print quality but also a good indication of how your product will appear.
Our advisors have an extensive library of live and plain options to send over. For anything unique or different, we can make a special request from the mill. It can potentially take a few weeks to source special samples, so it is wise to bear this in mind.
Revisions and scheduling
Sometimes, based on the samples or your forecasts, there may be a need to amend elements of the quote. We take these revisions on board and provide a final updated quote to clearly illustrate what has been requested.
Once the specification is finalised and you are happy with the price, we will then look to officially “book the job in”. We work with you to secure your production slots where the job will be allocated space on our machines. Our team will ask you for a file upload date and final delivery or mailing dates so that we can build a schedule. Once these dates are agreed upon, the production slot will be yours and cannot be reserved for anyone else.
We also factor in for any paper orders as sometimes with special stocks or very large orders there is an extended lead time for the mill to make the paper. Sometimes this can take up to 6-8 weeks.
Order placing and onboarding
With the order now placed, we will begin onboarding you. One of the first things is that you will have an account manager assigned to you. Your account manager will be there for all future projects and orders and will work with you directly as your main point of contact. We will arrange a face to face or virtual meeting with you to introduce ourselves and explain what is going to happen next. The onboarding will also explain what the next steps are and answer any questions you might have. Helpful resources and training will be provided in multiple areas such as file submission and preflight checks all of which are complimentary.
Visitors to our site are always encouraged as we are 100% transparent and are incredibly proud of our modern and impressive set-up. We receive fantastic customer feedback around these visits. The visits give them the reassurance that they have chosen an excellent partner who is a safe pair of hands for their work.
All our account managers have worked in other parts of the business during their time with us. Many started in production roles, giving them an expert level of knowledge benefitting the clients they deal with. They also have a “buddy”, who is a fellow account manager who will cover them and their work when they are on holiday. The buddy system provides total cover and understanding of your work and consistent points of contact.
Production Guide for Beginners
No beginners print guide would be complete without an overview of the process itself! We consider the production process to begin at the moment you upload and approve your artwork.

File Upload
In order to get started, we require your artwork. Which is all the pages of the product supplied as individual print ready PDF files.
The first step is that we set you up on a portal called Insite, where you will have your own password protected area. Insite allows you to upload your PDFs in a convenient, easy, and secure way. Customers can preflight and check them all before they sign them off to print.
As part of our onboarding the head of our prepress team is on hand to train you and your team in its use as well as providing ongoing support and advice.
Prepress
Prepress is sometimes called origination. It is used to describe the activities required to take the print ready pages (as pdfs) to process them to meet the job requirements. During this stage regular checks ensure the customer pages are finally approved and ready to be plated.
To make a printed section, your pdf pages are run through software to allocate page positions which we call an imposition. As sheets all must be folded down in specific ways it’s crucial that the order is correct! We also perform quality checks on each job as part of our procedures.
These impositions are then used to make the printing plates which are explained in the next step.
Our prepress team are always on hand to help with questions and queries, and we have a full Prepress Guide available.
Plate Making
A printing plate is a sheet of aluminium with a coating that repels water. We remove the areas of coating where we don’t want ink to appear during printing leaving an outline. Then the plate gets wrapped around a drum in the printing press ready for ink to be applied.
Most printers use a four colour process so we need one printing plate for each colour we use. This means we need four for the top of the sheet and four for the bottom of the sheet. Usually eight plates are needed for each print section, sometimes more might be needed in special circumstances. The average section tends to have sixteen A4 pages so it is impossible to make changes to just one page once a job has been plated as the whole set of four needs to be remade. This is why it gets more expensive to make changes to pages once the job has been plated.
The plates are made and checked by our prepress operatives in line with our ISO procedures. Once they are satisfied with the quality, the section is approved for the press room to collect and put onto the printing press.
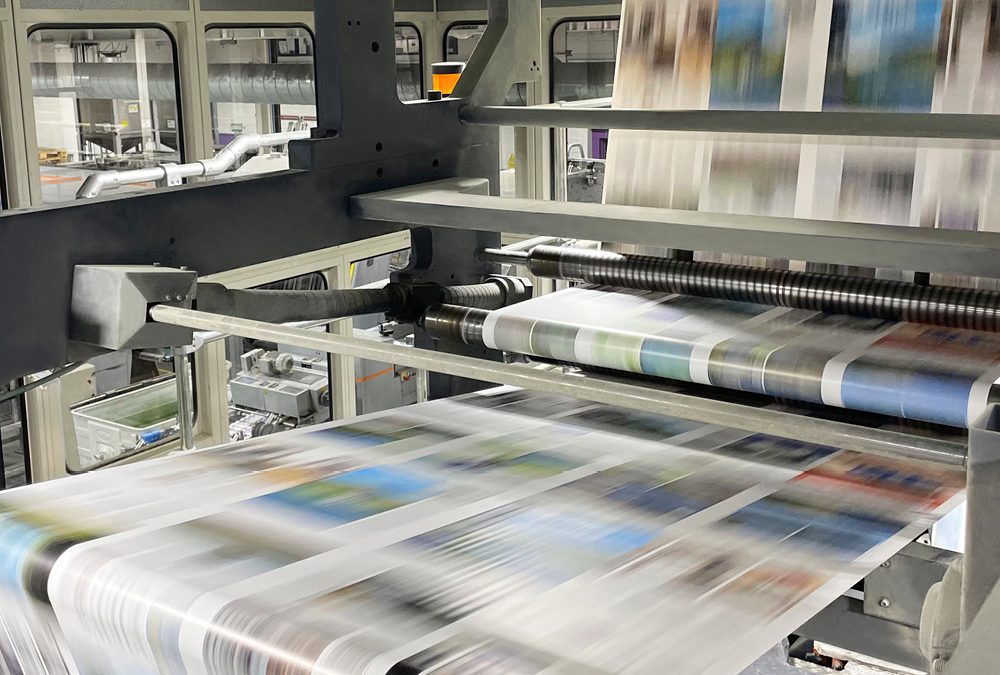
Printing
This is our favourite part!
It’s always exciting to see digital concepts and art come to life on something physical like paper. We have two different processes to make this happen in-house and each is best suited to a particular product. You might have heard of Web or Sheetfed printing. We have both and they each require printing plates, but they are very different in how the paper goes through the press.
Web Printing
Web printing is the main process that we use in house and it is a very popular method of printing. The web presess are incredibly quick and the paper is printed on, dried and folded in one process. Like sheetfed printing we use printing plates and use four colours as standard. The main difference between the two methods is that the paper on a web press comes off a reel. On the press the paper is threaded through the press as a continuous ribbon. We can then print both sides of the paper simultaneously as well as drying and folding it ready for binding with no extra steps needed. Because the print is instantly ready to be bound web printing is a fantastic option for text pages.
Sheetfed Printing
Sheetfed printing takes the paper through the press as individual sheets. On press the paper, in our case, is flipped over in the press to print the other side of the sheet in the same pass. The print is produced as a flat sheet that will need to be cut and folded once it has had a chance to dry. This method of printing is superb for covers which are often batched in “4’s” to save money for the customer. Usually a sheetfed press is fed by pallets of stacked sheets of paper. Instead there is also the option to feed in reels of paper which is then cut into sheets in line, thanks to Cutstar. This enables you to get the best paper price.
All our modern processes utilise the latest tech available, such as closed-loop colour systems that ensure consistency and quality throughout the print run. It is possible for customers to view their job printing live by “press passing”. This would have to be arranged in advance with the account manager to ensure that the job is scheduled to print at an appropriate time and not overnight for example.
We have a dedicated page that gives a much deeper understanding of Web and Sheetfed printing and which process is best suited for certain projects.
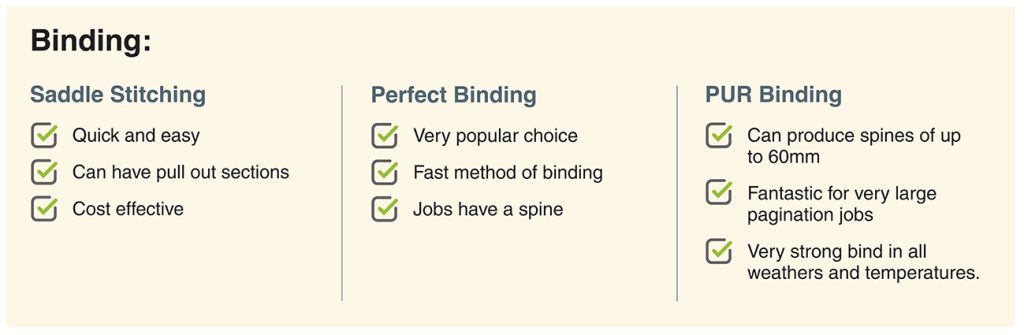
Binding
Once all the sections have been printed the work is passed to the bindery to finish the products. We have three options available in-house to bind your product. These are Perfect, PUR and Saddle stitching. Each has its own benefits, and we explain more on the Binding and Finishing page.
All of the methods of binding follow a similar work flow. Each will collate the sections in the appropriate order, bind them and then trim the product to its final size all in one pass. The main difference between the methods is what is used to bind the pages. In the case of saddle stitching, a line of wire is threaded through the centre of the product that looks like a staple. The other methods use an adhesive that is applied before the cover is added.
Some special finishes or sheet-fed sections will require some cutting and folding to take place before they can be bound. These steps also happen in the binding department.
Mailing and distribution
Depending on how the product needs to be distributed, we can help. Whether by our own in-house services or delivering to your preferred suppliers we have you covered!
Mailing involves either us or a specialist mailing house physically wrapping and posting your product. We do this by enclosing the print in a paper or poly wrap and inkjetting the names and addresses of the recipients on your data list. The proces takes place on a mailing line where extra inserts can also be added. Warners have a mailing facility in-house to meet the needs of our publishing customers. For the larger more bespoke mailings we would in most cases recommend we send the items to a preferred mailing provider.
Mailing is a complicated subject so in addition to this beginners guide to print we have a Mailing Guide that will help any new starters.
When it comes to transport and distribution, we are a little different to other printers. Uniquely we have our own fleet of tracked vehicles providing live information on deliveries. This fleet includes vans, lorries and articulated lorries allowing us to meet just about every delivery requirement!
In addition to our own fleet, we also work with pallet services to offer customers a choice in how they receive their products. We would arrange collection from our site. Our transport team work closely with the account managers to give you the best options for your requirements.
Alternatively, if you want to arrange your own collections and deliveries to our site, its not a problem. We are always happy to work with you and make the process as simple as possible.
Design and planning help
We are not designers, but we appreciate that there are some subtle differences that need to be factored in when designing artwork for print in addition to digital.
- Make sure it’s in CMYK
- Trim and bleed – add an extra around the page of up to 3mm that the artwork flows into
- Make sure you allow for the spine
- Keep your text page totals divisible by 16 – this saves a lot of money
- Make sure any barcodes are in black only and not four-colour
- Don’t use Pantone or special colours as standard – these are special considerations that can have massive cost implications!
- Ask for a spine calculation
- Make sure images are about 300dpi resolution
- Ask our prepress if you are not sure
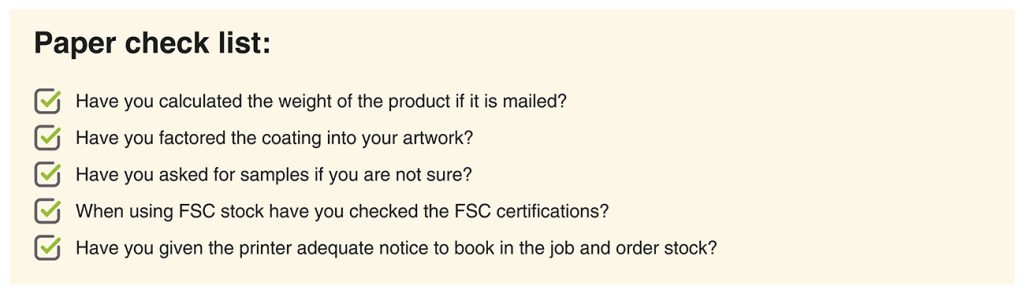
Paper
Paper is a special subject and requires some extra attention. The main things that you need to consider are the weight, the coating, the environmental certifications and the order time. Our paper-explained article is the perfect place to dive into paper properly and we would recommend reading it! As a starting point here are our top five paper checks before placing a job.
Further Beginners Print Guidance and Cost Saving
Though each job is unique there are some standard tips that any new starter to print can take advantage of to keep their costs down:
- Ask for options.
- Remember 16pp is the magic number for text pages.
- Order in advance.
- Build in extra time to get cheaper postage.
- Look at alternative papers.
Ultimately, the best advice that we can give you is to talk to us. Whether it’s in person, over a coffee, or via video or email, every company and every project is unique and needs to be treated as such. We want to give our customers the tools that they need to make the right decisions for themselves and their brands as they react to their respective markets.
If you would like to get started, we recommend heading over to our Contact Us page. You can always reach out to us to find further help. We also reccomend that you check out some of the other posts and videos we have produced.